Documentazione API
Get api token
var token = loginClient.getToken(companyLogin, apiKey);
var loginClient = new JSONRpcClient({
	'url': 'https://user-api.simplybook.me/login',
	'onerror': function (error) {
		alert(error);
	}
});
var token = loginClient.getToken('{companyLogin}', '{apiKey}');
Risultato del metodo
Corpo della risposta
Richiesta HTTP
Get event list
var events = client.getEventList();
var client = new JSONRpcClient({
	'url': 'https://user-api.simplybook.me',
	'headers': {
		'X-Company-Login': '{companyLogin}',
		'X-Token': '{token}'
	},
	'onerror': function (error) {
		alert(error);
	}
});
var services = client.getEventList();
Risultato del metodo
Corpo della risposta
Richiesta HTTP
Get performer list
var units = client.getUnitList();
var performers = client.getUnitList();Risultato del metodo
Corpo della risposta
Richiesta HTTP
Filter performers by service
// fetch service and performers selects here
var serviceId;
var performerId;
jQuery('#select_event_id').empty();
jQuery('#select_unit_id').empty();
jQuery('#select_event_id').append('<option value=""></option>');
jQuery('#select_unit_id').append('<option value=""></option>');
for (var id in services) {
    jQuery('#select_event_id').append('<option value="' + id + '">' + services[id].name + '</option>');
}
for (var id in performers) {
    jQuery('#select_unit_id').append('<option value="' + id + '">' + performers[id].name + '</option>');
}
jQuery('#select_event_id').change(function () {
	// service id
	serviceId = jQuery(this).val();
	var selectedService = services[serviceId];
	// filter available performers
	if (selectedService) {
		if (typeof(selectedService.unit_map) != 'undefined' && selectedService.unit_map.length) {
			jQuery('#select_unit_id option').attr('disabled', true);
			jQuery('#select_unit_id option[value=""]').attr('disabled', false);
			for (var i = 0; i < selectedService.unit_map.length; i++) {
				jQuery('#select_unit_id option[value="' + selectedService.unit_map[i] + '"]').attr('disabled', false);
			}
		} else {
			jQuery('#select_unit_id option').attr('disabled', false);
		}
	}
	jQuery('#eventId').val(serviceId).change();
});
jQuery('#select_unit_id').change(function () {
	performerId = jQuery(this).val();
});
Get closest day with available time slots
var firstWorkingDay = client.getFirstWorkingDay(performerId);
var firstWorkingDay = client.getFirstWorkingDay(performerId);Risultato del metodo
Corpo della risposta
Richiesta HTTP
Disable not working time in calendar
workCalendar = client.getWorkCalendar(year, month, performerId);
// Init datepicker.
var workCalendar = {};
jQuery('#datepicker').datepicker({
	'onChangeMonthYear': function (year, month, inst) {
		workCalendar = client.getWorkCalendar(year, month, performerId);
		jQuery('#datepicker').datepicker('refresh');
	},
	'beforeShowDay': function (date) {
		var year = date.getFullYear();
		var month = ("0" + (date.getMonth() + 1)).slice(-2);
		var day = ("0" + date.getDate()).slice(-2);
		var date = year + '-' + month + '-' + day;
		if (typeof(workCalendar[date]) != 'undefined') {
			if (parseInt(workCalendar[date].is_day_off) == 1) {
				return [false, "", ""];
			}
		}
		return [true, "", ""];
	}
});
var firstWorkingDateArr = firstWorkingDay.split('-');
workCalendar = client.getWorkCalendar(firstWorkingDateArr[0], firstWorkingDateArr[1], performerId);

jQuery('#datepicker').datepicker('refresh');
Risultato del metodo
Corpo della risposta
Richiesta HTTP
Get available time slots
var startMatrix = client.getStartTimeMatrix(from, to, eventId, unitId, count)
// Handle date selection
var count = 1; // How many slots book
function formatDate(date) {
	var year = date.getFullYear();
	var month = ("0" + (date.getMonth() + 1)).slice(-2);
	var day = ("0" + date.getDate()).slice(-2);

	return year + '-' + month + '-' + day;
}

function drawMatrix(matrix) {
	jQuery('#starttime').empty();

	for (var i = 0; i < matrix.length; i++) {
		jQuery('#starttime').append('<span data-time="' + matrix[i] + '">' + matrix[i] + '</span>');
	}
	jQuery('#starttime span').click(function () {
		startTime = jQuery(this).data('time');

		jQuery('#starttime span').removeClass('selected');
		jQuery(this).addClass('selected');
	});
}

jQuery('#datepicker').datepicker('option', 'onSelect', function () {
	var startDate = formatDate(jQuery(this).datepicker('getDate'));
	jQuery('#dateFrom, #dateTo').val(startDate);

	var startMatrix = client.getStartTimeMatrix(startDate, startDate, serviceId, performerId, count);

	drawMatrix(startMatrix[startDate]);
});
var startMatrix = client.getStartTimeMatrix(firstWorkingDay, firstWorkingDay, serviceId, performerId, count);
drawMatrix(startMatrix[firstWorkingDay]);
Risultato del metodo
Corpo della risposta
Richiesta HTTP
Check if additional fields plugin is activated
var additionalFieldsActivated = client.isPluginActivated('event_field');
var additionalFieldsActivated = client.isPluginActivated('event_field');Risultato del metodo
Corpo della risposta
Richiesta HTTP
Get additional fields
// load additional fields
var additionalFields = [];

function clearAdditionalFields() {
	jQuery('#additional-fields').empty();
	additionalFields = [];
}

function addAdditionalField(field) {
	var container = jQuery('<div class="form-group"></div>');
	var title = jQuery('<div class="control-label">' + field.title + '</div>');

	container.append(title);

	var fieldContainer = jQuery('<div class="field"></div>');

	container.append(fieldContainer);

	var fieldNode = null;
	switch (field.type) {
		case 'checkbox':
			fieldNode = jQuery('<input type="checkbox" name="' + field.name + '" id="' + field.name + '" value="1" />');
			if (field['default']) {
				fieldNode.attr('checked', true);
			}
			break;
		case 'select':
			fieldNode = jQuery('<select class="select select2" name="' + field.name + '" id="' + field.name + '"></select>');
			var values = field.values.split(',');
			for (var k = 0; k < values.length; k++) {
				fieldNode.append(jQuery('<option value="' + values[k].trim() + '">' + values[k].trim() + '</option>'));
			}
			if (field['default']) {
				fieldNode.val(field['default']);
			}
			break;
		case 'textarea':
			fieldNode = jQuery('<textarea name="' + field.name + '" id="' + field.name + '"></textarea>');
			if (field['default']) {
				fieldNode.val(field['default']);
			}
			break;
		default:
			fieldNode = jQuery('<input type="text" name="' + field.name + '" id="' + field.name + '" />');
			if (field['default']) {
				fieldNode.val(field['default']);
			}
			break;
	}
	if (fieldNode) {
		if (field.type == 'checkbox') {
			fieldNode.addClass('checkbox');
		} else {
			fieldNode.addClass('form-control');
		}
		fieldContainer.append(fieldNode);
		jQuery('#additional-fields').append(container);
	}
}

if (additionalFieldsActivated) {
	clearAdditionalFields();
	additionalFields = client.getAdditionalFields(serviceId);
	for (var i = 0; i < additionalFields.length; i++) {
		addAdditionalField(additionalFields[i]);
	}
}
Risultato del metodo
Corpo della risposta
Richiesta HTTP
Perform booking
// Collect client data
var clientData = {
	'name': jQuery('#clientName').val(),
	'email': jQuery('#clientEmail').val(),
	'phone': jQuery('#clientPhone').val()
};
// Collect additional fields
var additionalFieldValues = {};
jQuery('#additional-fields input, #additional-fields select, #additional-fields textarea').each(function () {
	var val = '';
	if (jQuery(this).attr('type') == 'checkbox') {
		if (jQuery(this).is(':checked')) {
			val = 1;
		} else {
			val = 0;
		}
	} else {
		val = jQuery(this).val();
	}
	additionalFieldValues[jQuery(this).attr('name')] = val;
});
var count = 1;

var result = client.book(serviceId, performerId, startDate, startTime, clientData, additionalFieldValues, count);
Risultato del metodo
Corpo della risposta
Richiesta HTTP
Summary
Thank you for reading!
Utilizza la nostra API per sviluppatori per creare la tua interfaccia di prenotazione. Puoi progettare tutte le soluzioni che desideri, dal più semplice widget all'applicazione multifunzionale con funzionalità personalizzate adatte al tuo business specifico.
Utilizza l'interfaccia di programmazione SimplyBook.me protocollo JSON-RPC 2.0.
Guarda un esempio di interfaccia di prenotazione basata sull'API, e leggi anche il codice sorgente di questa soluzione.
Autorizzazione
I metodi API di Simplybook richiedono un'autenticazione. Per autorizzare l'API Simplybook hai bisogno di ottenere una chiave d'accesso — ovvero un-token di accesso. Per ottenerlo devi utilizzare il metodo JSON-RPC ricevere il Token su http://user-api.simplybook.me/login inserendo la tua chiave API personale. Copia, la tua chiave API nell'interfaccia dell'amministratore:, vai sul link 'Plugin' e seleziona le impostazioni del plugin API. Quindi devi avviare l'accesso remoto all'API SimplyBook.me. La tua richiesta dovrebbe contenere le seguenti intestazioni: 'X-Company-Login', 'X-Token'.
Ottenuto il token di accesso, questo può essere implementato o da parte del cliente o dal tuo server, che è la soluzione più sicura.
Puoi usare javascript JSON-RPC-client library e php JSON-RPC-client library dai nostri esempi per le tue personali soluzioni per lo sviluppo.
Autorizzazione del client API (Società di servizio pubblico)
Autorizzazione dal codice lato client
Ottenere la chiave token
    var loginClient = new JSONRpcClient({
        'url': 'https://user-api.simplybook.me' + '/login',
        'onerror': function (error) {},
    });
    var token = loginClient.getToken( YOUR_COMPANY_LOGIN, YOUR_API_KEY);
Inizializzazione di JSON-RPC-client
    this.client = new JSONRpcClient({
        'url': 'https://user-api.simplybook.me',
        'headers': {
            'X-Company-Login': YOUR_COMPANY_LOGIN,
            'X-Token': token
        },
        'onerror': function (error) {}
    });
Autorizzazione dal codice lato server
Ottenere la chiave token
    $loginClient = new JsonRpcClient('https://user-api.simplybook.me' . '/login/');
    $token = $loginClient->getToken(YOUR_COMPANY_LOGIN, YOUR_API_KEY);
Inizializzazione client JSON-RPC.
    $client = new JsonRpcClient( 'https://user-api.simplybook.me' . '/', array(
        'headers' => array(
            'X-Company-Login: ' .  YOUR_COMPANY_LOGIN,
            'X-Token: ' . $token
        )
    ));
Autorizzazione API Utilizzatore/Amministratore (Servizio di amministrazione aziendale)
Autorizzazione dal codice lato client
Ottenere la chiave token
    var loginClient = new JSONRpcClient({
        'url': {$api_url} + '/login',
        'onerror': function (error) {},
    });
    var token = loginClient.getUserToken( YOUR_COMPANY_LOGIN,  YOUR_USER_LOGIN,  YOUR_USER_PASSWORD);
Inizializzazione client JSON-RPC.
    this.client = new JSONRpcClient({
        'url': 'https://user-api.simplybook.me' + '/admin/',
        'headers': {
            'X-Company-Login': YOUR_COMPANY_LOGIN,
            'X-User-Token': token
        },
        'onerror': function (error) {}
    });
Autorizzazione dal codice lato server
Ottenere la chiave token
    $loginClient = new JsonRpcClient('https://user-api.simplybook.me' . '/login/');
    $token = $loginClient->getUserToken({YOUR_COMPANY_LOGIN, YOUR_USER_LOGIN, YOUR_USER_PASSWORD);
Inizializzazione client JSON-RPC.
    $client = new JsonRpcClient('https://user-api.simplybook.me' . '/admin/', array(
        'headers' => array(
            'X-Company-Login: ' . YOUR_COMPANY_LOGIN,
            'X-User-Token: ' . $token
        )
    ));
Ottenere informazioni dal server di SimplyBook.me
Una pagina di prenotazioni, solitamente è una pagina dove i clienti scelgono un servizio di cui hanno bisogno, un fornitore di servizi e l'orario dell'appuntamento. Quindi un cliente inserisce alcuni dati di contatto e conferma la prenotazione. Le più complesse soluzioni possono includere il riempimento di differenti moduli di contatto, la creazione di gruppi o degli appuntamenti multipli o così via. Lasciaci descrivere tutto il lavoro creativo di una semplice pagina di prenotazioni. Quindi, se hai bisogno di aggiungere delle funzionalità extra alla tua pagina, guarda qui la lista completa dei mezzi API SimplyBook.me.
Quindi la prima cosa che dovresti mostrare è la lista dei servizi e la lista dei fornitori di servizi. Ottieni questi dati con i mezzi getEventListe getUnitList. Entrambi forniscono una lista con informazioni complete su ciascun elemento in essa contenuto, hai quindi molte possibilità su come visualizzare i servizi e i fornitori di servizi sulla tua pagina. Utilizza un filtro relativo alle caratteristiche dei dipendenti unit_map nella lista dei servizi, che conterrà le informazioni riguardo agli esecutori che provvederanno a svolgere i servizi selezionati.
Codice esempio per ottenere una lista servizi
    $services = $client->getEventList();
    // returns array(array(
    //     'id' => 1, - service id
    //     'name' => 'Service 1', - service's name
    //     'description' => 'Describe your service...', - service description
    //     'duration' => 60, - service duration
    //     'hide_duration' => 0, - Hide duration to clients flag,
    //     'picture' => null, - file name of picture or null
    //     'picture_path' => '/uploads/apidemo/event__picture/small/', - full path to picture,
    //     'position' => 1 - service position
    //     'is_active' => 1, - the service is activated
    //     'is_public' => 1, - the service is allowed to book by clients
    // ), ...)
Codice esempio per ottenere una lista dei fornitori di servizi
    $services = $client->getUnitList();
    // returns array(array(
    //    'id' => 1, - performer id
    //    'name' => 'Provider 1', - performer name
    //    'phone' => '111111111', - perfomer phone number
    //    'description' => 'Describe your performer...', - performer description
    //    'email' => 'test@gmail.com', - perfomer email,
    //    'is_active' => 1, - the performer is activated
    //    'is_visible' => 1, - the perfomer is visible for clients,
    //    'picture' => null, - file name of picture or null,
    //    'picure_path' => '/uploads/apidemo/unit_group__picture/small/', - full path to picture
    //    'position' => 1, - performer position
    //    'qty' => 1, performer quantity
    // ), ...)
Il prossimo passo per un cliente è scegliere il giorno e l'ora del suo appuntamento. Abbiamo utilizzato un selezionatore di date Bootstrap nell'esempio di utilizzo dell'API, ma tu puoi utilizzare questo o altri calendari. Per impostare la prima data del calendario, usa il mezzo getFirstWorkingDay. Può utilizzare l'ID del dipendente come parametro e mostrare il giorno successivo, quando il lavoratore selezionato (o qualsiasi altro dipendente dell'azienda di default) è disponibile per un appuntamento.{""|t} Per mostrare le fasce orarie all'interno di una data selezionata, devi utilizzare i mezzi getWorkCalendar e getStartTimeMatrix. Il primo metodo fornisce informazioni sull'orario di inizio e fine del giorno lavorativo e sui giorni festivi. Il secondo, l'elenco delle fasce orarie che possono essere prenotate per una certa data.
Esempio di codice per ottenere informazioni sui giorni lavorativi
    $year = 2020;
    $month = 3; // March
    $performerId = 1; // Can be null
    $workDaysInfo = $client->getWorkCalendar($year, $month, $performerId);
    // returns array(
    //     '2020-03-01' => array('from' => '09:00:00', 'to' => '18:00:00', 'is_day_off' => 0),
    //     '2020-03-02' => array('from' => '09:00:00', 'to' => '18:00:00', 'is_day_off' => 0),
    //     ...
    //);
Esempio di codice per ottenere la matrice dell'orario di inizio
    $dateFrom = '2020-03-03';
    $dateTo = '2020-03-04';
    $serviceId = 1;
    $performerId = 1;
    $qty = 1;
    $availableTime = $client->getStartTimeMatrix($dateFrom, $dateTo, $serviceId, $performerId, $qty);
    // returns array(
    //     '2015-03-03' => array('09:00:00', '09:30:00', '10:00:00', ....),
    //     '2015-03-04' => array('09:00:00', '09:30:00', '10:00:00', ....),
    //);
Un altro metodo utile di cui potresti avere bisogno è calculateEndTime. Ogni servizio può avere una propria durata, anche i dipendenti dell'azienda possono avere diversi orari di lavoro giorno per giorno. Quindi, utilizzando questo metodo, è possibile mostrare ad un cliente una data e un'ora della fine del servizio che ha prenotato correttamente.
Esempio di codice di calcolo dell'ora di fine appuntamento
    $startDateTime = '2020-03-03 09:00:00';
    $serviceId = 1;
    $performerId = 1;
    $availableTime = $client->calculateEndTime($startDateTime, $serviceId, $performerId);
    // returns '2020-03-03 10:00:00'
Quando un cliente clicca sul bottone della conferma di prenotazione tu devi utilizzare il mezzo prenotazione . Questa è la funzione principale che esegue tutte le convalide necessarie e registra una nuova prenotazione nel sistema SimplyBook.me. Ottiene informazioni relative alla prenotazione, i dati del cliente come il nome e il telefono e altre informazioni addizionali. Leggi la descrizione di questi parametri di questo mezzo nella lista delle funzioni API. Il risultato del mezzo prenotazione contiene un codice unico e altri dettagli della prenotazione oppure la lista di eventuali errori nel caso ce ne siano stati, in questo modo puoi mostrare il risultato della prenotazione al cliente nel modo più semplice e intuitivo.
Utilizzo della chiave segreta API
In alcuni casi il mezzo prenotazione può richiedere la conferma, ad esempio se accetti pagamenti dai clienti, confermerai la prenotazione soltanto dopo l'avvenuto pagamento. La procedura API SimplyBook.me confirmBookng accetta l'ID della prenotazione e la firma digitale come parametri (un altro metodo che richiede la firma digitale è cancelBookng). Per la generazione di una firma digitale può essere usata la tua chiave segreta API. Guarda cosa è possibile fare nell'esempio in basso. Puoi trovare la chiave segreta nell'interfaccia dell'amministratore al link 'Funzioni' dell'API nella lista delle funzionalità personalizzate.
Esempio di codice di prenotazione del servizio e sua conferma utilizzando la chiave segreta API
    $additionalFields = array(
	'6740d3bce747107ddb9a789cbb78abf3' => 'value1',
	'b0657bafaec7a2c9800b923f959f8163' => 'value2'
    );

    $clientData = array(
        'name' => 'Client name',
        'email' => 'client@email.com',
        'phone' => '+13152108338'
    );

    $bookingsInfo = $client->book($eventId, $unitId, $date, $time, $clientData, $additionalFields);

    if ($bookingsInfo->require_confirm) {
       foreach ($bookingsInfo->bookings as $booking) {
           $sign = md5($booking->id . $booking->hash . YOUR_API_SECRET_KEY);
           $result = $client->confirmBooking($booking->id, $sign);
           echo '<br>Confirm result</b><br />';
           var_dump($result);
        }
    }
Esempio di codice per inserire campi nel modulo di immissione
    $fields = $client->getAdditionalFields($eventId);
    // returns - array(array(
    //		'name' => 'b0657bafaec7a2c9800b923f959f8163', - field name
    //		'title' => 'Test digits', - field title
    //		'type' => 'digits', - field type
    //		'values' => null, - available values for select field type
    //		'default' => null, - default value for field
    //		'is_null' => null, - is filed nullable
    //		'on_main_page' => 1,
    //		'pos' => 1, - field position
    //		'value' => null
    // )), ...)
Funzioni personalizzabili SimplyBook.me
Se la tua azienda ha bisogno specificatamente di funzioni aggiuntive, puoi attivare ulteriori funzionalità. La lista completa delle funzioni personalizzate con dettagliate descrizioni è disponibile nella tua interfaccia dell'amministratore al link 'Funzioni aggiuntive'. Dopo aver abilitato la funzione personalizzata necessaria, le procedure API corrispondenti saranno attivate in modo da poterle utilizzare nel tuo codice.
Funzionalità di prenotazione codeflow
Autorizzare nell'API SimplyBook.me usando la funzione loginClient.getToken(companyLogin, apiKey);.
Verifica se il pluginCategorie dei servizi è attivo da isPluginActivated('event_category') se si, rendi visibile la lista delle categorie getCategoriesList().
Ottieni la lista dei servizi (eventi) e prestatori (unità) usando getEventList() e le funzioni getUnitList(). Se il quadro" unit_map" è disponibile per un servizio, questo significa che questo servizio può essere fornito solo da un dato prestatore.
Se il plugin Seleziona tutti gli operatori è attivato isPluginActivated('any_unit') e nessuna durata è impostata sia per il servizio che per il prestatore nel quadro "unit_map" allora l'utente deve selezionare l'opzione Tutti gli operatori o scegliere un prestatore manualmente. Ma la selezione manuale del fornitore del servizio non è possibile se getCompanyParam('any_unit__hide_other_units') è attivato.
Usa getStartTimeMatrix ($from as current date, $to as current date, $eventId, $unitId, $count as selected participants value ) per ottenere le fasce disponibili per una determinata data. $unitId deve essere nullo se l'opzioneTutti gli operatori è selezionata.
Se il plugin Seleziona tutti i lavoratori è attivato e Tutti i lavoratori è selezionata, utilizza getAvailableUnits($eventId, $dateTime, $count)/b> per ottenere le $unitId disponibili.
Se il plugin modello di immissione è attivatoisPluginActivated('event_field') seleziona la funzionegetAdditionalFields($eventId) per ottenere la lista dei campi che il cliente deve riempire.
Richiama book($eventId, $unitId, $date, $time, $clientData, $additional, $count, $batchId) per fare una prenotazione.
Servizio URL https://user-api.simplybook.me/login
-
getServiceUrl ($companyLogin)
Returns API url for given company login
-
getToken ($companyLogin, $apiKey)
Returns an application's token string for a company. You should use this token to authenticate all calls of
[[Company public service methods|Company public service API methods]] and [[Catalogue|Catalogue API methods]]. Toget application API key you need to enable [[Plugins#API|API plugin]].
-
getUserToken ($companyLogin, $userLogin, $userPassword)
Returns an authentication token string for certain user registered for company. You should use this token to
authenticate all calls of [[Company administration service methods|Company administration service API methods]] and[[Catalogue|Catalogue API methods]].
You can use either user password or API User Key for $userPassword parameter:
- Traditional password authentication (requires 2FA if enabled)
- API User Key (starts with "api_user_key_...") - bypasses IP verification
API User Keys can be generated in Settings > API User Keys section.
Example: var token = loginClient.getUserToken(YOUR_COMPANY_LOGIN, YOUR_USER_LOGIN, "api_user_key_..."); -
getApplicationToken ($applicationApiKey)
Returns an application's token string for an application. You should use this token to authenticate all calls of
[[Company public service methods|Company public service API methods]] and [[Catalogue|Catalogue API methods]]. Toget application API key please contact SimplyBook.me support team.
Servizio URL https://user-api.simplybook.me/
-
getUnitList ($isVisibleOnly, $asArray, $handleClasses, $searchString)
{@inheritdoc}
-
getEventList ($isVisibleOnly, $asArray, $handleClasses, $searchString)
{@inheritdoc}
-
getCategoriesList ($isPublic)
{@inheritdoc}
-
getLocationsList ($isPublic)
{@inheritdoc}
-
getPaymentProcessorConfig ($paymentProcessor)
Returns payment processor config
-
validatePayment ($paymentInfo, $cartId)
Validate application payment.
-
getBookingCart ($bookingIds)
Returns cart information by bookings ids.
cart_idandcart_hashis used to create secure signature to confirm cart payment.status- current cart status
amount- is total amount to payment
currency- cart currency
cart- contains cart items. You can use them to provide information for payment system. Each item is object with following fields:
id- booking id
event_id- service id
name- event name + start date time (use it to provide cart information for payment system)
price- booking price
qty- qty of bookings -
getBookingCartInfo ($cartId, $sign)
Returns current cart information
cart_idandcart_hashis used to create secure signature to confirm cart payment.amount- is total amount to payment
currency- cart currency
cart- contains cart items. You can use them to provide information for payment system. Each item is object with following fields:
id- booking id
event_id- service id
name- event name + start date time (use it to provide cart information for payment system)
price- booking price
qty- qty of bookings -
getBookingCartStatus ($id)
Returns current cart status
Possible result values:cancel- user has canceled payment
paid- user has paid
error- error has been occurred on validation payment
not_paid- cart is not paid yet or payment status is pending -
confirmBookingCart ($cartId, $paymentProcessor, $sign)
Confirm booking cart. Use it to confirm payment. Signature is required.
-
confirmBooking ($id, $sign)
Confirm booking. Signature is required.
$sign = md5($bookingId . $bookingHash . $secretKey);Call this method from server side only
-
confirmBookingPayment ($id, $paymentProcessor, $sign)
Confirm booking payment. Signature is required.
$sign = md5($bookingId . $bookingHash . $secretKey);Call this method from server side only
-
confirmBookingBatch ($batchId, $batchType, $sign)
Confirms booking batch. Signature is required.
$sign = md5($batchId . $batchHash . $secret)Call this method from server side only
-
getBooking ($id, $sign)
Returns an object with details information about booking.
$signparameter must be a string created
with formula:md5($bookingId . $bookingHash . $secretKey). You can get$bookingHashvalue as result of
[[#book|book]]API method call. Method return an error with code -32080
(Appointment couldn't be found) if record with specified id not exists. Methods returns an error with code -32085
(Signature error) if$signparameter is wrong. -
getBookingDetails ($id, $sign)
Returns an object with details information about booking.
$signparameter must be a string created
with formula:md5($bookingId . $bookingHash . $secretKey). You can get$bookingHashvalue as result of
[[#book|book]]API method call. Method return an error with code -32080
(Appointment couldn't be found) if record with specified id not exists. Methods returns an error with code -32085
(Signature error) if$signparameter is wrong. -
isPaymentRequired ($eventId)
Returns true if [[Plugins#Accept_payments|Accept payments]] plugin activated and event with specified id has
configured price. If no paramentes specified then method returns true if payments plugin activated and at leastone event has configured price. Otherwise returns false.
-
book ($eventId, $unitId, $date, $time, $clientData, $additional, $count, $batchId, $recurringData)
Creates new booking record. Returns an object with appointment information or throw exception if booking time not
available or any of required parameters missed. If appointment requires confirmation, in result object will berequire_confirm = true.$startDateand$startTimespecifies a date of
booking and time slot. Time value should be multiple to 'timeframe' configuration of company (see
[[#getTimeframe|getTimeframe]]API method).$endDateand$endTimeparameters
should be calculated according to service duration. However you can specify different values to make appointment
longer or shorter then service configuration. Note that$endDateand$endTimeshould be
later in time than$startDateand$startTime. If your clients located in different time
zone you should specify'client_time_offset'value in$clientDataobject as difference
between client's time zone and company's time zone in minutes. For example if company located in city with time
zone GMT+2 and customer located in city with GMT+3 then$clientTimeOffsetwill be 60 minutes. You
can get information about company's time zone using[[#getCompanyInfo|getCompanyInfo]]API method. To
create batch booking you can specify eithercountmore then 1 or validbatchId(only one
parameter can be specified). You should specify an$additionalFieldsparameter if service requires
some additional fields (see [[Plugins#Additional fields|Additional fields plugin]]). To create a booking with promo code you
should pass it as additional field. For example:{"name": "promocode", "value": "some code", "type": "text"}
See [[#book response|example]] ofbookAPI method response. -
getRecurringDatetimes ($eventId, $unitId, $date, $time, $recurringData, $productIds)
Get list of dates for recurring booking
-
hasUpcommingPromotions ()
Returns availability of active promotions
-
validatePromoCode ($code, $startDateTime, $eventId, $count, $clientData)
Validate promotion code.
Returns true in case promocode is valid otherwise throws exception with error. -
getPromocodeInfo ($code)
Returns an object with detailed information about promotion by promotion code. Returns null if no promotions with
specified code were not found. -
getPromotionRewardInfo ($commonPromotionId, $clientId, $hash)
Returns promotion reward by common promotion id, client id and hash.
-
getUserLicenseText ()
Returns user license text if user license plugin is turned on,
otherwise throws exception -
getPrivacyPolicyText ()
Returns user privacy policy text if user license plugin is turned on and privacy policy is enabled,
otherwise throws exception -
getClientInfo ($clientId, $sign)
Returns client info by client id
-
getClientInfoByLoginPassword ($login, $password)
Returns client information by clients login (email)/password
-
remindClientPassword ($email)
Sends remind email for client
-
getClientByLoginHash ($hash, $setExpired, $expireOtherHashes)
Get client information by client login hash
-
modifyClientPassword ($clientId, $data, $sign)
Change client password
-
modifyClientInfo ($clientId, $data, $sign)
Edit client information data
-
getMembershipList ()
Returns list of available memberships
-
getClientMembershipList ($filter, $clientId, $sign)
Returns purchased membership list
-
getClientBookings ($clientId, $sign, $filter)
Returns client bookings, accepts $filter ($filter {upcoming_only: true/false, confirmed_only: true/false})
-
getProductList ($filter)
Returns product list with filter.
At this time filter can accept only service_id parameter -
getClassesList ($filter)
Returns company's classes list. Ordered by position
-
getCaptchaChallenge ()
Returns captcha challenge data needed to render the SBCaptcha widget.
If captcha is disabled for the company, returns { provider: null }.
Pass the resulting object directly to `new SBCaptcha({ challenge: data, ... })`.
After the widget resolves, submit the token as `captcha_token` inside `$additional` when calling `book()`.
Response always includes:
widgetUrl — absolute URL of captcha-widget.js (the SBCaptcha universal loader)
assets — { js: [], css: [] } with all URLs already absolute
imageUrl — absolute URL (imagecaptcha only); relative path resolved against the company public domain -
rescheduleBook ($shedulerId, $sign, $startDate, $startTime, $endDate, $endTime, $additional, $clientTimeOffset, $clientTimezone)
Edit existing booking record. See [[#book|book]] API method description for more details about date/time parameters,
time zone handling and additional fields. Returns null if parameters not valid. -
getCompanyParam ($key)
Returns company config value for key. A different set of keys available for public API and for company
administration API. Method return 'invalid params' error (code -32602) in case if access to specified key notallowed. See [[#Company_params|list of available keys]].
-
getCompanyParams ($keys)
Returns company's config values for specified keys as key-value map. For non-existent and not-allowed param keys
it will return '''false''' as result. A different set of keys available for public API and for companyadministration API. See [[#Company_params|list of available keys]].
-
getCancellationPolicy ()
Returns cancellation policy rules.
If cancellation policy custom feature is not activated, method returns null. -
getTimelineType ()
Returns company timeline type
-
calculateEndTime ($startDateTime, $eventId, $unitId, $productIds)
Returns end datetime if booking is available, else return false
-
getWorkCalendar ($year, $month, $data)
Returns company work schedule as array
Eg.:{'2014-05-01': {'from': '09:00:00', 'to': '21:00:00', 'is_day_off': '0'}, '2014-05-02': ...} -
getReservedTime ($from, $to, $eventId, $unitId, $count)
Returns map of objects for each day in specified date range. The key of the result mps is a date string. The value
is an array of two objects. Both objects contains list of time slots for typereserved_timeand typenot_worked_time.reserved_timetype represents time slots working time but already booked
by clients. Nobody knows what kind of data represented bynot_worked_timetype. Please don't use it.
If [[Plugins#Google calendar sync plugin|Google calendar sync plugin]] enabled then object with
reserved_timetype will contain not empty list of time slots marked as busy in Google calendar. Call
[[#isPluginActivated|isPluginActivated('google_calendar_export')]]API method to check if Google
calendar sync plugin activated.
Example:
  {

    "2016-02-05": [

      {

        "dd": [], // time slots from Google calendar

        "events": [ // reserved time slots

          { "from": "16:00", "to": "16:30" },

          { "from": "16:30", "to": "17:00" },

          ... ],

        "type": "reserved_time",

      },

      {

        "events": [

          { "from": "09:00", "to": "09:30" },

          { "from": "09:30", "to": "10:00" },

          ... ],

        "type": "not_worked_time"

     }],

     ...

  }
-
getWorkDaysInfo ($from, $to, $unitId, $eventId, $count, $productIds)
Returns an information about working hours and break times for specified service and performer for a period
between two dates. If only service specified then information about performer (or performers) will be taken fromservice configuration. Method returns a list of objects for each date in specified period. Count of objects in
list depends on break times. For example if performer works from 9:00 till 19:00 with one hour break at 13:00 method
returns:
  {'2014-05-14' : [

    {'from': '09:00:00', 'to': '13:00:00'},

    {'from': '14:00:00', 'to': '19:00:00'}

  ] }
Warning! Method can return a time string '24:00:00' as right edge of time range. This happens in case if time
range finishes on midnight. -
getFirstWorkingDay ($data)
Returns first working date for unit
-
getStartTimeMatrix ($from, $to, $eventId, $unitId, $count, $bookingId, $productIds)
Returns available start time, taking into account breaktimes, start and end working time
Eg.:{'2014-05-14': ['09:00:00', ...], ...}
If locations plugin activated for company you should pass a list as $unitID parameter for filter results with
units available only for selected location. See [[Plugins#Unit_location|Unit location]] plugin description for
more details. -
getCartesianStartTimeMatrix ($from, $to, $eventId, $unitId, $count, $bookingId, $productIds)
Returns available start time, taking into account breaktimes, start and end working time.
The difference between getStartTimeMatrix and getCartesianStartTimeMatrix is that getCartesianStartTimeMatrixprovides time slots for each individual provider.
Eg.:{"provider_id": 1, "service_id": 1, "timeslots": {"2014-05-14": ['09:00:00', ...], ...}, ...}
If locations plugin activated for company you should pass a list as $unitID parameter for filter results with
units available only for selected location. See [[Plugins#Unit_location|Unit location]] plugin description for
more details. -
getAvailableTimeIntervals ($dateFrom, $dateTo, $eventId, $unitId, $count)
Returns available time intervals for all service providers for given period, taking into account breaktimes, start and end working time
Eg.:{['2016-03-04': ['1': [['09:00:00','09:30:00'], ['11:15:00','14:45:00']] , ...], ...]} -
getServiceAvailableTimeIntervals ($dateFrom, $dateTo, $eventId, $unitId, $count)
Returns available time intervals for all servics for given period, taking into account breaktimes, start and end working time
Eg.:{['2016-03-04': ['1': [['09:00:00','09:30:00'], ['11:15:00','14:45:00']] , ...], ...]} -
getReservedTimeIntervals ($dateFrom, $dateTo, $eventId, $unitId, $count, $bookingId)
Returns not available time
Eg.:{'2014-05-14': [{'reserved_time': [{'from': '14:00', 'to': '16:30'}], 'type': "reserved_time"}, ...], ...} -
getAvailableUnits ($eventId, $dateTime, $count, $unitId, $productIds)
Returns list of available unit ids for specified date and service or empty array if all units are not allowed.
Eg.:[1, 2, 3] -
getAnyUnitData ()
Returns information about [[Plugins#Any_Employee_selector|Any Employee selector plugin]] configuration. Returns
null if plugin not enabled.
Example:
{
"description" : "Select this option, if you want to find an available time with any of the employees",
"hide_other_units" : 1, // 1 or 0
"image" : null,
"name" : "Any employee",
"picture_path" : null,
"random_selection" : 0 // 1 or 0
} -
getAdditionalFields ($eventId)
Return additional fields for certain event if [[Plugins#Additional_fields|Additional fields plugin]] is
activated. Returns empty array otherwise. Call[[#isPluginActivated|isPluginActivated('event_field')]]API method to check if 'event_field' plugin activated.
-
getTimeframe ()
Returns company's timeframe configuration (in minutes). Timeframe can be either 5, 10, 15, 20, 30 or 60 minutes.
You can find more details about timeframe [[Settings#Timeframe|here]]. -
isPluginActivated ($pluginName)
Return plugin status true if status active, else false. $pluginName parameter is a plugin identifier.
See [[Plugins|plugins]] page for full plugins description. See [[#Plugin's identifiers|list of available plugin's names]]. -
getPluginStatuses ($pluginNames)
Return plugin status true if status active, else false. See [[#Plugin's identifiers|list of available plugin's names]].
-
getCompanyInfo ()
Returns an object with detailed information about company. See [[#getCompanyInfo response|example of response]].
-
createBatch ()
Creates new booking batch record. Returns newly created batch id. You can use this id in
[[#book|book]]
API method. -
getCountryPhoneCodes ()
Returns country phone code list
-
getPluginPromoInfoByCode ()
Returns an object with detailed information about promotion by promotion code. You can get promotion code
using[[Catalogue#getPromotionList|getPromotionList]]API method. If promotion record with specifiedcode not found then method returns an empty array (an empty object). If [[Plugins#Simply Smart Promotions|Simply Smart Promotions plugin]]
not enabled then method returns an error with code -32001 (Plugin is not activated). Use
[[#isPluginActivated|isPluginActivated('promo')]]API method call to check if plugin enabled.
See [[#getPromotionList response|example]] ofgetPromotionListAPI method response. Please note that
response contains a list of services for wich promotion discount can be applied (service_idskey). -
getCompanyTimezoneOffset ()
Returns company timezone offset and company timezone
Servizio URL https://user-api.simplybook.me/admin
-
getUserPhoneValidationInfo ($userId, $number)
Get user db data (id, phone, is_validated)
-
saveConfigKeys ($data, $module, $plugin)
Save configuration keys
-
getNotificationConfigStructure ($plugin)
Get structure of SMS and Email notification config params
-
getBookings ()
Returns list of bookings filtered by given params. Filter params represented as object with following fields:
* '''date_from''' a date of booking in string format 'Y-m-d'
* '''time_from''' a time string in format 'H:i:s'
* '''date_to''' a date string in format 'Y-m-d'
* '''time_to''' a time string in format 'H:i:s'
* '''created_date_from''' a date string in format 'Y-m-d'
* '''created_date_to''' a date string in format 'Y-m-d'
* '''edited_date_from''' a date string in format 'Y-m-d'
* '''edited_date_to''' a date string in format 'Y-m-d'
* '''unit_group_id''' an integer. Use it to get bookings assigned for certain service provider.
* '''event_id''' an integer. Use it to get bookings only for certain service.
* '''is_confirmed''' 1 or 0. If [[Plugins#Approve booking|Approve booking]] plugin enabled then method will return confirmed bookings with approve status 'new'.
* '''client_id''' an integer. Use it to get bookings only for certain client.
* '''order''' string either 'record_date', 'date_start' or 'date_start_asc'. By default used 'date_start' value.
* '''booking_type''' a string. Value of this field depends on Approve booking plugin status.
* '''code''' booking code
*: If plugin not active:
** '''all''' for all bookings (default value)
** '''cancelled''' alias to 'is_confirmed' equal to 0
** '''non_cancelled''' alias to 'is_confirmed' equal to 1
*: If plugin active:
** '''all''' for all bookings (default value)
** '''cancelled''' returns bookings with 'is_confirmed' field equals to 0 and approve booking status equals to 'cancelled' (or booking does not have any approve status)
** '''non_cancelled''' returns bookings with either 'is_confirmed' field equals to 1 or approve booking status equals to 'new'
** '''cancelled_by_client''' returns bookings approved by admin but cancelled by client
** '''cancelled_by_admin''' returns bookings cancelled by admin
** '''non_approved_yet''' returns bookings with approve status 'new'
** '''approved''' returns bookings with either 'is_confirmed' field equals to 1 and approve booking status equals to 'approved' (or booking does not have any approve status)
Example:
{
"date_from":"2015-12-29",
"date_to":"2015-12-29",
"booking_type":"cancelled",
"event_id":"5",
"order":"start_date"
} -
pluginZapierSubscribe ($url, $notificationType)
'create', 'cancel', 'new_client', 'change', 'create_invoice', 'change_client', 'delete_client'
-
getBookingDetailsZapierMock ()
-
getClientInfo ($clientId)
Returns client data
-
getClientInfoZapier ($clientId)
Returns client data
-
getClientInfoZapierMock ()
Returns client data
-
getBookingsZapier ()
Returns list of bookings filtered by given params
-
getInvoiceDetailsMock ()
-
getBookingDetails ($id)
Returns detailed bookings object by booking id. See [[#getBookingDetails_response|response example]].
-
getBookingOnlineMeetingLink ($id)
Get online meeting link for booking
-
getWorkDaysTimes ($startDateTime, $endDateTime, $type)
Return busy time by unit id by GoogleCalendar plugin if enabled.
Please note that this method may return not actual data because data synchronization between server andGoogle Calendar may take some time and synchronized data are cached for 15 minutes.
-
getGoogleCalendarBusyTime ($startDateTime, $endDateTime, $unitId)
Returns a list of objects represented a time intervals marked as busy in Google Calendar. Each object of result
containsfromandtoproperties with datetime string as value. This method only actual if[Plugins#Google calendar sync plugin|Google calendar sync plugin] enabled. If plugin not enabled an empty list will
be returned. You should call[[#isPluginActivated|isPluginActivated('google_calendar_export')]]to
check status of the plugin. Each object of result containsfromandtoproperties with
datetime string as value. Please note that this method may return not actual data because data synchronization
between server and Google Calendar may take some time and synchronized data are cached for 15 minutes.
Example:
  [

   {"from" : "2016-02-16 13:30:00",

    "to" : "2016-02-16 16:00:00"},

    ...

  ]
-
getGoogleCalendarBusyTimeAvailableUnits ()
Returns configured unit ids, allowed to sync busy time
-
getBookingLimitUnavailableTimeInterval ($startDateTime, $endDateTime, $eventId)
Returns time intervals not available for bookings because of configuration of [[Plugins#Limit bookings|Limit bookings]]
plugin for period of time. Returns empty array if plugin not available. -
getUnitWorkingDurations ($dateStart, $dateEnd, $unitGroupId)
Return working durations
-
getWorkload ($dateStart, $dateEnd, $unitGroupId)
Return workload data for units in period of time. Workload for each unit represented as array with work hours
at index 0, confirmed booking hours as load at index 1 and cancelled bookings hours at index 2.
Example:
['2015-10-21' : {
5 : [
10, // working hours
10, // load hours (confirmed bookings hours)
0 // cancelled bookings hours
] }] -
getBookingRevenue ($dateStart, $dateEnd, $unitGroupId, $serviceId)
Return bookings count and revenue value for each date in specified period. Data grouped by unit id and
represented as array with bookings count at index 0 and revenue amount at index 1. You can filter data eitherby unit or by service. Set
$dateStartand$dateEndto null to get data for current week.
Example:
['2015-11-12' : {
3 : [
11, // bookings count
128.53 // revenue
]} -
getUnitWorkdayInfo ($dateStart, $dateEnd, $unitGroupId)
Return workday info (date_start and date_end)
-
cancelBooking ($id)
Cancels booking. Returns true on success. Returns an error with code -32080 (Appointment couldn't be found) if
no booking with specified id were found. -
cancelBatch ($id, $bookingIds)
Cancel batch of bookings. Returns true on success. Returns an error with code -32080 (Appointment couldn't be found)
if no booking with specified id were found. A booking with first id in$bookingIdslist is used forinformation in notifications.
-
book ($eventId, $unitId, $clientId, $startDate, $startTime, $endDate, $endTime, $clientTimeOffset, $additional, $count, $batchId, $recurringData)
Creates new booking record. Returns an object with appointment information or throw exception if booking time not
available or any of required parameters missed. If appointment requires confirmation, in result object will berequire_confirm = true.$startDateand$startTimespecifies a date of
booking and time slot. Time value should be multiple to 'timeframe' configuration of company (see
[[#getTimeframe|getTimeframe]]API method).$endDateand$endTimeparameters
should be calculated according to service duration. However you can specify different values to make appointment
longer or shorter then service configuration. Note that$endDateand$endTimeshould be
later in time than$startDateand$startTime. If your clients located in different time
zone you should specify'client_time_offset'value in$clientDataobject as difference
between client's time zone and company's time zone in minutes. For example if company located in city with time
zone GMT+2 and customer located in city with GMT+3 then$clientTimeOffsetwill be 60 minutes.
You can get information about company's
time zone using[[#getCompanyInfo|getCompanyInfo]]API method. To create batch booking you can
specify eithercountmore then 1 or validbatchId(only one parameter can be
specified). You should specify an$additionalFieldsparameter if service requires some additional
fields (see [[Plugins#Additional fields|Additional fields plugin]]).
To create a booking with promo code you should pass it as additional field. For example:{"promocode": "some code"}
If [[Plugins#Unit location|Unit location]] enabled you need to pass locations ID parameter as additional field
location_id. For example:{"location_id": "1"}. Use[[#isPluginActivated|isPluginActivated('location')]]
to check if plugin active and[[#getLocationsList|getLocationsList()]]method to get list of
available locations.
See [[#book response|example]] ofbookAPI method response. -
editBook ($shedulerId, $eventId, $unitId, $clientId, $startDate, $startTime, $endDate, $endTime, $clientTimeOffset, $additional)
Edit existing booking record. See [[#book|book]] API method description for more details about date/time parameters,
time zone handling and additional fields. Returns null if parameters not valid. -
addClient ($clientData, $sendEmail)
Adds new client with specified data. You can specify name, email, phone, address1, address2, city, zip,
country_id.email, phone number or both of them can be mandatory fields. You should call
getCompanyParam('require_fields')method to check which fields are required.
Method returns an error:
* -32061 Client name value is wrong
* -32062 Client email value is wrong
* -32063 Client phone value is wrong
Example:
{
name: "Frances T. Perez",
phone: "+1502-810-4521",
email: "FrancesTPerez@teleworm.us",
address1: "3872 Earnhardt Drive",
address2: "Louisville, KY 40219",
city: Louisville,
zip: 3872
} -
editClient ($clientId, $clientData)
Edits client's record. See
[[#addClient|addClient]]method description for list of available fields.
Method returns an id of client's record. -
changeClientPassword ($clientId, $password, $sendEmail)
Change client password and send password email changing
-
resetClientsPassword ($clientIds)
Resets client password and send them emails
-
remindClientsPassword ($email)
Sends remind email for client
-
getClientList ($searchString, $limit)
Returns list of clients associated with company. You can use either phone number, email address or name as value
for$searchString. Pass an empty string for$searchStringand null for$limitparameters to get all records. See
[[#addClient|addClient]]API method for list of available fields
of client data object. -
getStatuses ()
Returns list of available statuses or an empty list if [[Plugins#Status|Status plugin]] not enabled.
-
getBookingStatus ($bookingId)
Returns status of given booking (if status plugin is enabled)
default status will be returned if bookingId does not exists -
setStatus ($bookingId, $statusId)
Sets specified status for booking. Returns an error with code -32020 if logged in user don't have access to edit
bookings. This method does nothing if [[Plugins#Status|Status plugin]] not enabled. -
getRecurringSettings ($eventId)
Returns an object with recurring settings for an event. Returns false if specified event does not configured as
recurring. -
getTopServices ($dateStart, $dateEnd)
Returns a list with statistics for services for a period of time. This data contains number of bookings and
revenues value for each service. -
getTopPerformers ()
Returns a list with statistics for performers. This data contains number of bookings and revenues value for each performer.
-
getRecurringDatetimes ($eventId, $unitId, $date, $time, $recurringData, $endDateTime, $productIds)
Get list of dates for recurring booking
-
getCountryList ()
Get list of all countries
-
getStates ()
Get list of all country states
-
getFeedbacks ($approvedOnly, $reviewsOnly, $lastOnly, $limit)
Get list of feedbacks
-
getRecentActions ($lastOnly, $limit)
Returns latest actions
-
getWarnings ($lastObly)
Returns a list of objects represented system warnings. Each warning contains
warning_typeandwarning_text
properties.warning_textproperty contains localized message.warning_typecan be one of the values:
* '''sms_limit''' – warning indicates low amount of SMS credits
* '''sheduler_limit''' – warning indicates low amount of available bookings -
updateNotification ($type)
Mark notifications as readed
-
getLastNotificationUpdate ($type)
Returns last update datetime
-
getBookingCancellationsInfo ($dateStart, $dateEnd)
Returns statistics about created bookings and cancellations for a time period. Data presented as array of hashes for
each type of operation (created or cancelled booking) groped by clients."type"field can be either"create", "cancel" or "nopayment_cancel". If
"user_id"not specified then bookings where created or
cancelled by admin or employee. Data with type"nopayment_cancel"represents bookings cancelled
automatically by system.
Example:
3 bookings where created by admin or employee and 2 bookings where automatically cancelled by system.
[{
"cnt" : 3,
"firstname" : null,
"lastname" : null,
"login" : null,
"type" : "create",
"user_id"" : null
}, {
"cnt" : 2,
"firstname" : null,
"lastname" : null,
"login" : null,
"type" : "nopayment_cancel",
"user_id"" : null
}] -
pluginApproveBookingApprove ($id)
Sets approve booking status to 'approved' if [[Plugins#Approve booking|Approve booking]] plugin enabled and returns
list of approved booking IDs. Returns false if plugin not enabled. Use[[#isPluginActivated|isPluginActivated('approve_booking')]]API method call to check if plugin enabled.
-
pluginApproveBookingCancel ($id)
Sets approve booking status to 'canceled' if [[Plugins#Approve booking|Approve booking]] plugin enabled and returns
true. Returns false if plugin not enabled. Use[[#isPluginActivated|isPluginActivated('approve_booking')]]API method call to check if plugin enabled.
-
pluginApproveGetPendingBookingsCount ()
Returns count of bookings pending approval if [[Plugins#Approve booking|Approve booking]] plugin enabled. Returns
0 if plugin not enabled. Use[[#isPluginActivated|isPluginActivated('approve_booking')]]API methodcall to check if plugin enabled.
-
pluginApproveGetPendingBookings ()
Returns list of objects with information about bookings pending approval if [[Plugins#Approve booking|Approve booking]]
plugin enabled. Returns empty list if plugin not enabled. Use[[#isPluginActivated|isPluginActivated('approve_booking')]]API method call to check if plugin enabled.
-
getPluginList ()
Returns a list of all plugins associated with company with status.
-
getBookingComment ($id)
Returns booking comment
-
setBookingComment ($id, $comment)
Set booking comment
-
getCurrentTariffInfo ()
Returns all information about current tariff (subscription). For example:
{
"name" : "gold",
"expire_date" : "2016-02-11 12:32:00",
"rest" : 41, // number of days until subscription expiration
"color" : "#fcb322"
} -
getRegistrations ($groupBy)
Returns number of clients registrations by 'day', 'week' or 'month'. A time period depends on selected
grouping parameter:
* for 'day' methods returns statistics for last 31 days
* for 'week' methods returns data last 10 weeks period
* for 'month' time period is last 12 months -
getBookingStats ($groupBy)
Returns statistic about bookings count grouped by 'day', 'week' or 'month'. A time period depends on selected
grouping parameter:
* for 'day' methods returns statistics for last 31 days
* for 'week' methods returns data last 10 weeks period
* for 'month' time period is last 12 months -
getVisitorStats ($groupBy)
Returns statistics about page visits if plugin [[Plugins#Visitor Counter|Visitor Counter plugin]] enabled. Returns
an empty list if plugin not enabled. Use[[#isPluginActivated|isPluginActivated('counter')]]API methodcall to check if plugin enabled. Results can be grouped by 'day', 'week' or 'month'. A time period depends on
selected grouping parameter:
* for 'day' methods returns statistics for last 31 days
* for 'week' methods returns data last 10 weeks period
* for 'month' time period is last 12 months -
getSocialCounterStats ($provider)
Returns social counters value for your domain
-
getCompanyCurrency ()
Returns company's currency as three chars code (ISO 4217).
-
getClientComments ($clientId, $shedulerId)
Returns list of all comments for given client
-
getClientSoapData ($clientId)
Returns current SOAP information by client id
-
getClientSoapHistory ($clientId)
Returns SOAP history by client id
-
getClientSoapCryptData ($clientId)
Returns current SOAP (crypt) information by client id
-
getClientSoapCryptHistory ($clientId)
Returns SOAP (crypt) history by client id
-
getCurrentUserDetails ()
Returns an object with information about logged in user. Note: you are responsible for implementation of some
access rights based ongroupproperty value. Most of API methods returns an error if user has low accessrights but not all. There are 4 roles:
* '''Administrator''' - have full access to the system
* '''Senior Employee''' - have access to calendar, services and providers, and can modify bookings related with user
* '''Junior Employee''' - can access caledar (but only to own bookings), services associated with user
* '''Viewer''' - have only access to calendar and services in read only mode
groupproperty can be one of the values:
*shop_user- "Senior Employee" access role
*station_user- "Junior Employee" access role
*admin- "Administrator" access role
*viewer- "Viewer" access role
*reseller_company_admin- reserved
Example:
  {

    "id": 1,

    "login": admin,

    "email": "admin@mycoolcompany.com";

    "firstname": "Michail",

    "lastname": " ",

    "phone": "",

    "group": "admin",

    "is_blocked": 0,

    "last_access_time": "2016-06-06 17:55:51",

    "unit_group_id": null

  }
-
getCategoriesList ($isPublic)
Returns company categories list if [[Plugins#Service categories|Service categories plugin]] is activated. Returns
an error with code -32001 if plugin is not activated. Use[[#isPluginActivated|isPluginActivated('event_category')]]API method to check if plugin activated.
-
getLocationsList ($isPublic, $asArray)
Returns available locations for company if plugin [[Plugins#Unit location|Unit location plugin]] is activated. Return
an error with code -32001 if plugin is not activated. Use[[#isPluginActivated|isPluginActivated('location')]]API method to check if plugin activated.
This method accepts two boolean flags as parameters. If '''isPublic''' flag is '''true''' then method returns only
public locations. If '''asArray''' flag is '''true''' method returns list of objects. Otherwise method returns
map of objects with object id as key. You can omit both parameters. -
getMembership ($membershipId)
Returns membership's data object.
-
getClientMembershipList ($clientId)
Returns purchased membership list
-
setWorkDayInfo ($info)
Set work day schedule for company|service|provider for week_day|date
Example:
{
"start_time":"10:00",
"end_time":"18:00",
"is_day_off":0,
"breaktime":[{"start_time":"14:00","end_time":"15:00"}],
"index":"1",
"name":"Monday",
"date":"",
"unit_group_id":"",
"event_id":""
}
index is 1-7 for Monday - Sunday (used for weekly settings)
date is used to set worktime for special date
unit_group_id is provider id
event_id is service id
if unit_group_id and event_id not passed then it set data for company -
deleteSpecialDay ($date, $params)
Delete special date if set
Example:
{
"unit_group_id":"",
"event_id":""
} -
getCompanyWorkCalendarForYear ($year)
Returns company special days and vacations
-
getServiceWorkCalendarForYear ($year, $eventId)
Returns special days and vacations, defined for given service (event)
-
getCompanyVacations ()
Get list of company vacations in format array(vacation_id => array())
-
getServiceVacations ($serviceId)
Get list of service vacations
-
getPerformerVacations ($performerId)
Get list of performer vacations
-
getCompanyVacation ($vacationId)
Get company vacation by id
-
getServiceVacation ($vacationId, $serviceId)
Get service vacation by id
-
getPerformerVacation ($vacationId, $performerId)
Get service vacation by id
-
saveCompanyVacation ($data)
Save company vacation data
(create or update table depending on 'id' param existing in $data) -
saveServiceVacation ($data, $serviceId)
Save company vacation data
(create or update table depending on 'id' param existing in $data) -
savePerformerVacation ($data, $performerId)
Save company vacation data
(create or update table depending on 'id' param existing in $data) -
deleteCompanyVacation ($vacationId)
Delete company vacation with all it's bindings
(including created special days in work_day_special table) -
deleteServiceVacation ($vacationId, $serviceId)
Delete service vacation with all it's bindings
(including created special days in work_day_special table) -
deletePerformerVacation ($vacationId, $unigGroupId)
Delete performer vacation with all it's bindings
(including created special days in work_day_special table) -
getClassesList ($isVisibleOnly, $asArray)
Returns company's classes list. If
$asArrayis false then method returns a map with event id as key
and details object as value. If parameter set to true then method returns a list sorted by 'position' property ofclass's details object.
-
getProductList ($filter)
Returns product list with filter.
At this time filter can accept only service_id parameter -
getBookingReport ()
Get paginated data for Booking report
The following filters can be provided in request param:
Date date_from, date_to, created_date_from, created_date_to
Integer unit_group_id, client_id
String code, promo_code
String booking_type = 'approved' | 'not_approved_yet' | 'cancelled_by_admin' | 'cancelled_by_client' | 'non_cancelled' | 'cancelled' | 'all'
Order can be one of the following values: record_date, date_start, date_start_asc
Return data in the following format:
array(
'data' => $data,
'metadata' => array(
'items_count'
'pages_count'
'page'
'on_page'
)
or Api_Service_Exception in error case -
getClientReport ()
Get paginated data for Client report
The following filters can be provided in request param:
Date date_from, date_to
Integer event_id, unit_group_id, client_id
String client_search (search string, can contains client name, address, phone)
String service_using_type = 'used_in_period' | 'not_used_in_period' | 'not_used_in_period_but_used_before'
No custom ordering implemented yet
Group data = 'client' | 'client_email_phone' | 'client_email' | 'client_phone'
Return data in the following format:
array(
'data' => $data,
'metadata' => array(
'items_count'
'pages_count'
'page'
'on_page'
)
or Api_Service_Exception in error case -
getSmsReport ()
Get paginated data for SMS report
The following filters can be provided in request param:
Date date_from, date_to
Integer unit_group_id, client_id
String phone, message
No custom ordering implemented yet (always ordered by client name)
Return data in the following format:
array(
'data' => $data,
'metadata' => array(
'items_count'
'pages_count'
'page'
'on_page'
)
or Api_Service_Exception in error case -
getSmsGateways ()
gets differend sms providers(transport) used by system
-
getEmailReport ()
Get paginated data for email report
Return data in the following format:
array(
'data' => $data,
'metadata' => array(
'items_count'
'pages_count'
'page'
'on_page'
)
or Api_Service_Exception in error case -
getPosReport ()
Get paginated data for Pos report
Return data in the following format:
array(
'data' => $data,
'metadata' => array(
'items_count'
'pages_count'
'page'
'on_page'
)
or Api_Service_Exception in error case -
getFeedbackReport ()
Get paginated data for Feedback report
The following filters can be provided in request param:
Date date_from, date_to
Integer from 1 to 5 rate_from, rate_to
String name, subject, message
Report can be ordered by one of the following fields:
date, rate, name, message, subject, answer
Return data in the following format:
array(
'data' => $data,
'metadata' => array(
'items_count'
'pages_count'
'page'
'on_page'
)
or Api_Service_Exception in error case -
getPromotionList ($isVisibleOnly, $asArray, $promotionType)
Get detailed list of promotions (new)
-
getPromotionInstanceList ($promotionType, $asArray)
Get all list of promotion instances
-
getPromotionDetails ($id)
Return promotion detailed info
-
getStaticPageList ()
Get static page list
-
confirmInvoice ($id, $paymentSystem)
Confirms invoice by id
-
applyPromoCode ($id, $code)
Applies promo code to order (Coupons & Gift Cards custom feature)
-
applyTip ($id, $percent, $amount)
Applies tip to order (Tips custom feature)
You can apply tip by percent or by amount -
getCountByShedulerChannels ($startDate, $endDate)
-
getCompanyInfo ()
Returns company information for the current company.
-
getCompanyParam ($key)
Returns company config value for key. A different set of keys available for public API and for company
administration API. Method return 'invalid params' error (code -32602) in case if access to specified key notallowed. See [[#Company_params|list of available keys]].
-
getCompanyParams ($keys)
Returns company's config values for specified keys as key-value map. For non-existent and not-allowed param keys
it will return '''false''' as result. A different set of keys available for public API and for companyadministration API. See [[#Company_params|list of available keys]].
-
getCancellationPolicy ()
Returns cancellation policy rules.
If cancellation policy custom feature is not activated, method returns null. -
getTimelineType ()
Returns company timeline type
-
getEventList ($isVisibleOnly, $asArray, $handleClasses, $searchString)
Returns company's events list. If
$asArrayis false then method returns a map with event id as key
and details object as value. If parameter set to true then method returns a list sorted by 'position' property ofevent's details object.
-
getUnitList ($isVisibleOnly, $asArray, $handleClasses, $searchString)
Returns list of service performers. If
$asArrayis false then method returns a map with event id as
key and details object as value. If parameter set to true then method returns a list sorted by 'position' propertyof event's details object.
-
calculateEndTime ($startDateTime, $eventId, $unitId, $productIds)
Returns end datetime if booking is available, else return false
-
getWorkCalendar ($year, $month, $data)
Returns company work schedule as array
Eg.:{'2014-05-01': {'from': '09:00:00', 'to': '21:00:00', 'is_day_off': '0'}, '2014-05-02': ...} -
getReservedTime ($from, $to, $eventId, $unitId, $count)
Returns map of objects for each day in specified date range. The key of the result mps is a date string. The value
is an array of two objects. Both objects contains list of time slots for typereserved_timeand typenot_worked_time.reserved_timetype represents time slots working time but already booked
by clients. Nobody knows what kind of data represented bynot_worked_timetype. Please don't use it.
If [[Plugins#Google calendar sync plugin|Google calendar sync plugin]] enabled then object with
reserved_timetype will contain not empty list of time slots marked as busy in Google calendar. Call
[[#isPluginActivated|isPluginActivated('google_calendar_export')]]API method to check if Google
calendar sync plugin activated.
Example:
  {

    "2016-02-05": [

      {

        "dd": [], // time slots from Google calendar

        "events": [ // reserved time slots

          { "from": "16:00", "to": "16:30" },

          { "from": "16:30", "to": "17:00" },

          ... ],

        "type": "reserved_time",

      },

      {

        "events": [

          { "from": "09:00", "to": "09:30" },

          { "from": "09:30", "to": "10:00" },

          ... ],

        "type": "not_worked_time"

     }],

     ...

  }
-
getWorkDaysInfo ($from, $to, $unitId, $eventId, $count, $productIds)
Returns an information about working hours and break times for specified service and performer for a period
between two dates. If only service specified then information about performer (or performers) will be taken fromservice configuration. Method returns a list of objects for each date in specified period. Count of objects in
list depends on break times. For example if performer works from 9:00 till 19:00 with one hour break at 13:00 method
returns:
  {'2014-05-14' : [

    {'from': '09:00:00', 'to': '13:00:00'},

    {'from': '14:00:00', 'to': '19:00:00'}

  ] }
Warning! Method can return a time string '24:00:00' as right edge of time range. This happens in case if time
range finishes on midnight. -
getFirstWorkingDay ($data)
Returns first working date for unit
-
getStartTimeMatrix ($from, $to, $eventId, $unitId, $count, $bookingId, $productIds)
Returns available start time, taking into account breaktimes, start and end working time
Eg.:{'2014-05-14': ['09:00:00', ...], ...}
If locations plugin activated for company you should pass a list as $unitID parameter for filter results with
units available only for selected location. See [[Plugins#Unit_location|Unit location]] plugin description for
more details. -
getCartesianStartTimeMatrix ($from, $to, $eventId, $unitId, $count, $bookingId, $productIds)
Returns available start time, taking into account breaktimes, start and end working time.
The difference between getStartTimeMatrix and getCartesianStartTimeMatrix is that getCartesianStartTimeMatrixprovides time slots for each individual provider.
Eg.:{"provider_id": 1, "service_id": 1, "timeslots": {"2014-05-14": ['09:00:00', ...], ...}, ...}
If locations plugin activated for company you should pass a list as $unitID parameter for filter results with
units available only for selected location. See [[Plugins#Unit_location|Unit location]] plugin description for
more details. -
getAvailableTimeIntervals ($dateFrom, $dateTo, $eventId, $unitId, $count)
Returns available time intervals for all service providers for given period, taking into account breaktimes, start and end working time
Eg.:{['2016-03-04': ['1': [['09:00:00','09:30:00'], ['11:15:00','14:45:00']] , ...], ...]} -
getServiceAvailableTimeIntervals ($dateFrom, $dateTo, $eventId, $unitId, $count)
Returns available time intervals for all servics for given period, taking into account breaktimes, start and end working time
Eg.:{['2016-03-04': ['1': [['09:00:00','09:30:00'], ['11:15:00','14:45:00']] , ...], ...]} -
getReservedTimeIntervals ($dateFrom, $dateTo, $eventId, $unitId, $count, $bookingId)
Returns not available time
Eg.:{'2014-05-14': [{'reserved_time': [{'from': '14:00', 'to': '16:30'}], 'type': "reserved_time"}, ...], ...} -
getAvailableUnits ($eventId, $dateTime, $count, $unitId, $productIds)
Returns list of available unit ids for specified date and service or empty array if all units are not allowed.
Eg.:[1, 2, 3] -
getAnyUnitData ()
Returns information about [[Plugins#Any_Employee_selector|Any Employee selector plugin]] configuration. Returns
null if plugin not enabled.
Example:
{
"description" : "Select this option, if you want to find an available time with any of the employees",
"hide_other_units" : 1, // 1 or 0
"image" : null,
"name" : "Any employee",
"picture_path" : null,
"random_selection" : 0 // 1 or 0
} -
getAdditionalFields ($eventId)
Return additional fields for certain event if [[Plugins#Additional_fields|Additional fields plugin]] is
activated. Returns empty array otherwise. Call[[#isPluginActivated|isPluginActivated('event_field')]]API method to check if 'event_field' plugin activated.
-
getTimeframe ()
Returns company's timeframe configuration (in minutes). Timeframe can be either 5, 10, 15, 20, 30 or 60 minutes.
You can find more details about timeframe [[Settings#Timeframe|here]]. -
isPluginActivated ($pluginName)
Return plugin status true if status active, else false. $pluginName parameter is a plugin identifier.
See [[Plugins|plugins]] page for full plugins description. See [[#Plugin's identifiers|list of available plugin's names]]. -
getPluginStatuses ($pluginNames)
Return plugin status true if status active, else false. See [[#Plugin's identifiers|list of available plugin's names]].
-
createBatch ()
Creates new booking batch record. Returns newly created batch id. You can use this id in
[[#book|book]]
API method. -
getCountryPhoneCodes ()
Returns country phone code list
-
getPluginPromoInfoByCode ()
Returns an object with detailed information about promotion by promotion code. You can get promotion code
using[[Catalogue#getPromotionList|getPromotionList]]API method. If promotion record with specifiedcode not found then method returns an empty array (an empty object). If [[Plugins#Simply Smart Promotions|Simply Smart Promotions plugin]]
not enabled then method returns an error with code -32001 (Plugin is not activated). Use
[[#isPluginActivated|isPluginActivated('promo')]]API method call to check if plugin enabled.
See [[#getPromotionList response|example]] ofgetPromotionListAPI method response. Please note that
response contains a list of services for wich promotion discount can be applied (service_idskey). -
getCompanyTimezoneOffset ()
Returns company timezone offset and company timezone
Servizio URL https://user-api.simplybook.me/catalog
-
getCompanyList ($filter, $from, $limit)
Returns companies list
$filter filter params. Object that contains following params
'search_string': String,

'service_name': String,

'company_name': String,

'company_address': String,

'category_id': Integer,

'tag_ids': [Integer, Integer, ...],

'tags': String,

'country_id': String,

'city_id': String,

'nearby': {

    'radius': Integer,

    'center': {

       'lat': Number,

       'lng': NUmber

    }

}
Use tag_ids OR tags -
getPromotionList ($filter, $from, $limit)
Returns active promotion list
$filter filter params. Object that contains following params
'search_string': String,

'service_name': String,

'company_name': String,

'company_address': String,

'tag_ids': [Integer, Integer, ...],

'tags': String,

'country_id': String,

'city_id': String,

'nearby': {

    'radius': Integer,

    'center': {

       'lat': Number,

       'lng': NUmber

    }

}
Use tag_ids OR tags -
getPromotionListByIds ()
Returns active promotion list
-
getCompanyCount ($filter)
Returns total companies count with specified filter
$filter filter params. Object that contains following params
'search_string': String,

'service_name': String,

'company_name': String,

'company_address': String,

'tag_ids': [Integer, Integer, ...],

'tags': String,

'country_id': String,

'city_id': String,

'nearby': {

    'radius': Integer,

    'center': {

       'lat': Number,

       'lng': NUmber

    }

}
Use tag_ids OR tags -
getPromotionCount ($filter)
Returns total active promotions count with specified filter
$filter filter params. Object that contains following params
'search_string': String,

'service_name': String,

'company_name': String,

'company_address': String,

'tag_ids': [Integer, Integer, ...],

'tags': String,

'country_id': String,

'city_id': String,

'nearby': {

    'radius': Integer,

    'center': {

       'lat': Number,

       'lng': NUmber

    }

}
Use tag_ids OR tags -
getTopCountries ()
Returns country list as Array order by company count in country
-
getTopCities ()
Returns city list as Array order by company count in city
-
getCountries ()
Returns a list of objects with just two properties each:
idand country. Anid
is a two character string with ISO 3166-1 country code. -
getCities ($country, $withActiveCompany)
Returns a list of objects. If
$countryparametr specified then method returns only cities of this
country. Each object in list has 4 properties:
*id- number. A unique identificator of city. You should use it as filter options in methodsgetCompanyList.
*city- string. A city name.
*count_id- string. Two chars ISO 3166-1 country code.
*count- number.
Example:
  [{

    "cnt" : 7,

    "country_id"" : "GB",

    "id" : 4607,

    "name" : "Uxbridge"

    },

    ...]
-
getTags ($filter)
Returns tags list
$filter filter params. Object that contains following params
'tag_ids': [Integer, Integer, ...],

'tags': String,

'country_id': String,

'city_id': String
Use tag_ids OR tags -
getCompanyInfo ($login)
Returns company information by company login
-
getPromotionInfo ($id, $feedbackFrom, $feedbackCount)
Returns promotion information by id
-
getRelatedPromotions ($id, $count)
Returns related promotions by given promotion id
-
getCompanyReviews ($login, $count, $offset)
Returns a list of company's review objects.
[{

  "company_id" : 86409,

  "domain" : "simplybook.me",

  "feedback_datetime" : "2015-10-27 13:06:57",

  "feedback_id" : 4623,

  "feedback_link" : "",

  "id" : 17384,

  "image" : "http://graph.facebook.com/1020443689023222/picture",

  "link" : "https://www.facebook.com/app_scoped_user_id/1020443689023222/",

  "message" : "Brilliant!",

  "name" : "Simply Booker",

  "provider" : "",

  "provider_data" : "...", // String. An object encoded with PHP's serialize method.

  "rate" : 5, // 0 to 5 rate

  "status" : "approved", // 'new' or 'approved'

  "subject" : "Good",

  "with_comment" : 1

},

...]
-
getCompanyReviewsCount ($login)
Returns company's reviews count
-
getCompanyReview ($login, $reviewId)
Returns a company's review objects.
-
getClientReviewsLikes ($clientId, $clientProvider)
Returns a list of company's review likes.
-
addCompanyReview ($login, $subject, $message, $rate, $provider, $accessToken)
Adds company review
-
addPromotionReview ($promotionId, $subject, $message, $rate, $provider, $accessToken)
Add promotion review
-
getPromotionReviews ($promotionId)
Returns promotion reviews list
-
getRecentPromotions ($count)
Returns list of promotions ordered by date DESC
-
getRecentFeedbacks ($count)
Returns list of feedbacs ordered by date DESC
-
getRecentCompanies ($count)
Returns list of companies ordered by date DESC
-
getCategories ()
Returns all categories as list of objects. Each category can have a subcategories. Each subcategory contains parent
category id incompany_category_idfield. For top level categories this field isnullandis_headerfield istrue.
Example:
  [{

     "company_category_id": null,

     "id": "1",

     "image": "/common/images/category_icons/car.png",

     "is_active": "1",

     "is_header": "1",

     "name": "Cars",

   },

   {

     "company_category_id": "1",

     "id" = 11;

     "image": null,

     "is_active": "1",

     "is_header": "0",

     "name": "Car wash",

   },

  ...]
-
getFeedbackList ()
Get list of ALL simplybook feedbacks
-
getCompanyPromotionList ($promotionCompanyLogin, $count)
Returns a list of promotions objects associated with specified company. If company doesn't have any promotions or
[[Plugins#Simply_Smart_Promotions|Simply Smart Promotions plugin]] not active for this company method returns anempty list.
-
getUserLocation ($ip)
Returns user location info
-
getAutocompleete ($filter, )
Returns suggestions for autocompeter
$filter filter params. Object that contains following params
'search_string': String,

'service_name': String,

'company_name': String,

'company_address': String,

'category_id': Integer,

'tag_ids': [Integer, Integer, ...],

'tags': String,

'country_id': String,

'city_id': String,

'nearby': {

    'radius': Integer,

    'center': {

       'lat': Number,

       'lng': NUmber

    }

}
Use tag_ids OR tags -
deleteClientFeedbacks ($gdprDataSerialized)
Anonymize client feedbacks and feedback likes
according to GDPR client's right to be forgotten -
deleteClientPromotionFeedbacks ($gdprDataSerialized)
Delete promotion_feedbak and promotion_feedback_response data
according to GDPR client's right to be forgotten
Swagger (also known as OpenAPI) is a standard format for describing REST APIs. It allows both humans and computers to understand the capabilities of an API without access to source code, documentation, or network traffic inspection.
Key benefits of using Swagger/OpenAPI include:
- Documentation: Automatically generate interactive API documentation.
- Client SDK Generation: Generate client libraries in various programming languages.
- Testing: Easily test API endpoints using tools like Postman or Swagger UI itself.
Useful Tools:
- Postman: A popular API client that makes it easy to send HTTP requests and inspect responses.
- Swagger Tools: A suite of tools for designing, building, and documenting APIs.
- Swagger Editor: An online editor for designing, defining, and visualizing OpenAPI specifications.
- Hoppscotch: A free, fast and beautiful API request builder. Alternative to Postman.
Perché migliaia di clienti scelgono l'API SimplyBook.me?
Interfaccia chiara e semplice. Costruire il tuo sito di prenotazioni personale è facilissimo
Puoi attivare facilmente tutte le funzionalità di cui hai bisogno
Pianificazione in tempo reale – i tuoi clienti possono prenotare appuntamenti quando e dove vogliono 24 ore su 24 e 7 giorni su 7
La nostra applicazione ti offre un sacco di altre caratteristiche utili. Clicca qui per scoprire di più sulle nostre funzioni.
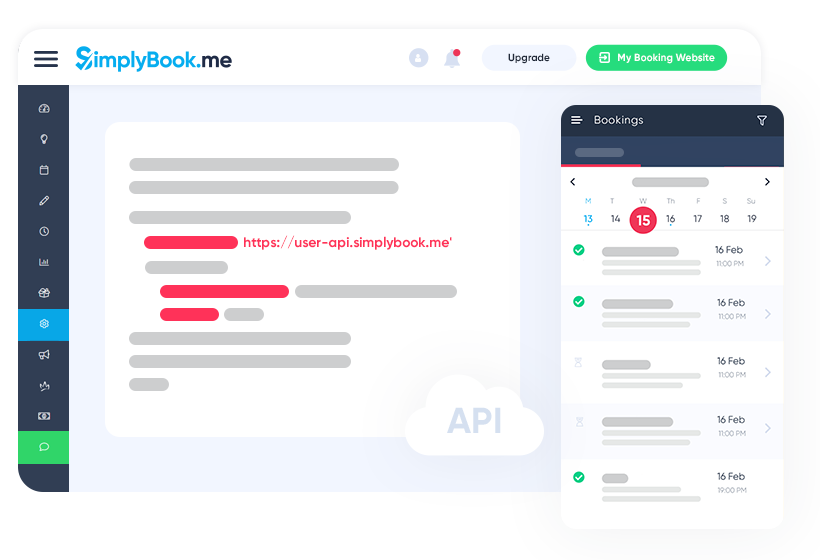
Fa in modo che i tuoi clienti prenotino i servizi senza abbandonare la tua app!
Rendi il tuo sito web o la tua app più importanti, coinvolgenti e redditizi, dando la possibilità ai tuoi clienti di poter fare quello che desiderano, scoprendo le attività commerciali locali. La nostra API renderà facile includere un pulsante 'Prenota ora' direttamente nel tuo sito web, consentendo ai tuoi clienti di pianificare appuntamenti in tempo reale, giorno e notte.
La nostra API ti da accesso a tutti i dati delle prenotazioni di cui hai bisogno per creare e offrire funzionalità di pianificazione al tuo gruppo di clienti.
Connettendo un cliente con la tua pianificazione aziendale, stiamo creando un nuovo modo di fare commercio. Riteniamo che la prenotazione diretta dell'appuntamento tramite la tua app o il nostro sito web ci consenta di farti trovare un nuovo cliente, non solo uno potenziale.